

I love totes, they're so handy to throw your stuff into while running errands or taking a trip. At 14.5" H x 15" W, this bag is just the right size for carrying your papers, books, tablet, or whatever stitching project you're working on. When I saw this panel from Lori Holt's Flea Market collection, I just knew it would make a cute bag!

I lined the tote with fabric and fusible interfacing to give it some body. It's washable and reversible too. It's easy to make, I'll show you how.
What you'll need:
- Bag front & back (and optional inside pocket) - one "applique" panel from the Flea Market collection by Riley Blake (or other cotton panel that would look good with (2) 16" squares cut out for the front and back), or 1/2 yard of fabric
- Interfacing - 1 Yard Pellon medium-weight fusible
- Lining - 1/2 Yard coordinating cotton fabric (I used the text print from Flea Market)
- Handles - 1/4 Yard coordinating cotton fabric (I used the red check from Flea Market
- Lining of pocket (optional) - Scrap of light-colored fabric (you may have enough bag lining fabric for this
I suggest prewashing your fabrics so that they won't shrink while adhering the fusible interfacing (you'll be using steam to fuse it to the fabric).
CUT:
(2) 16" square sections from the panel (or yardage) for the bag front and back. (You may have to tug on the corners a bit to get the panel square.)
(2) 16" squares from the fusible interfacing
(2) 16" squares from the lining fabric
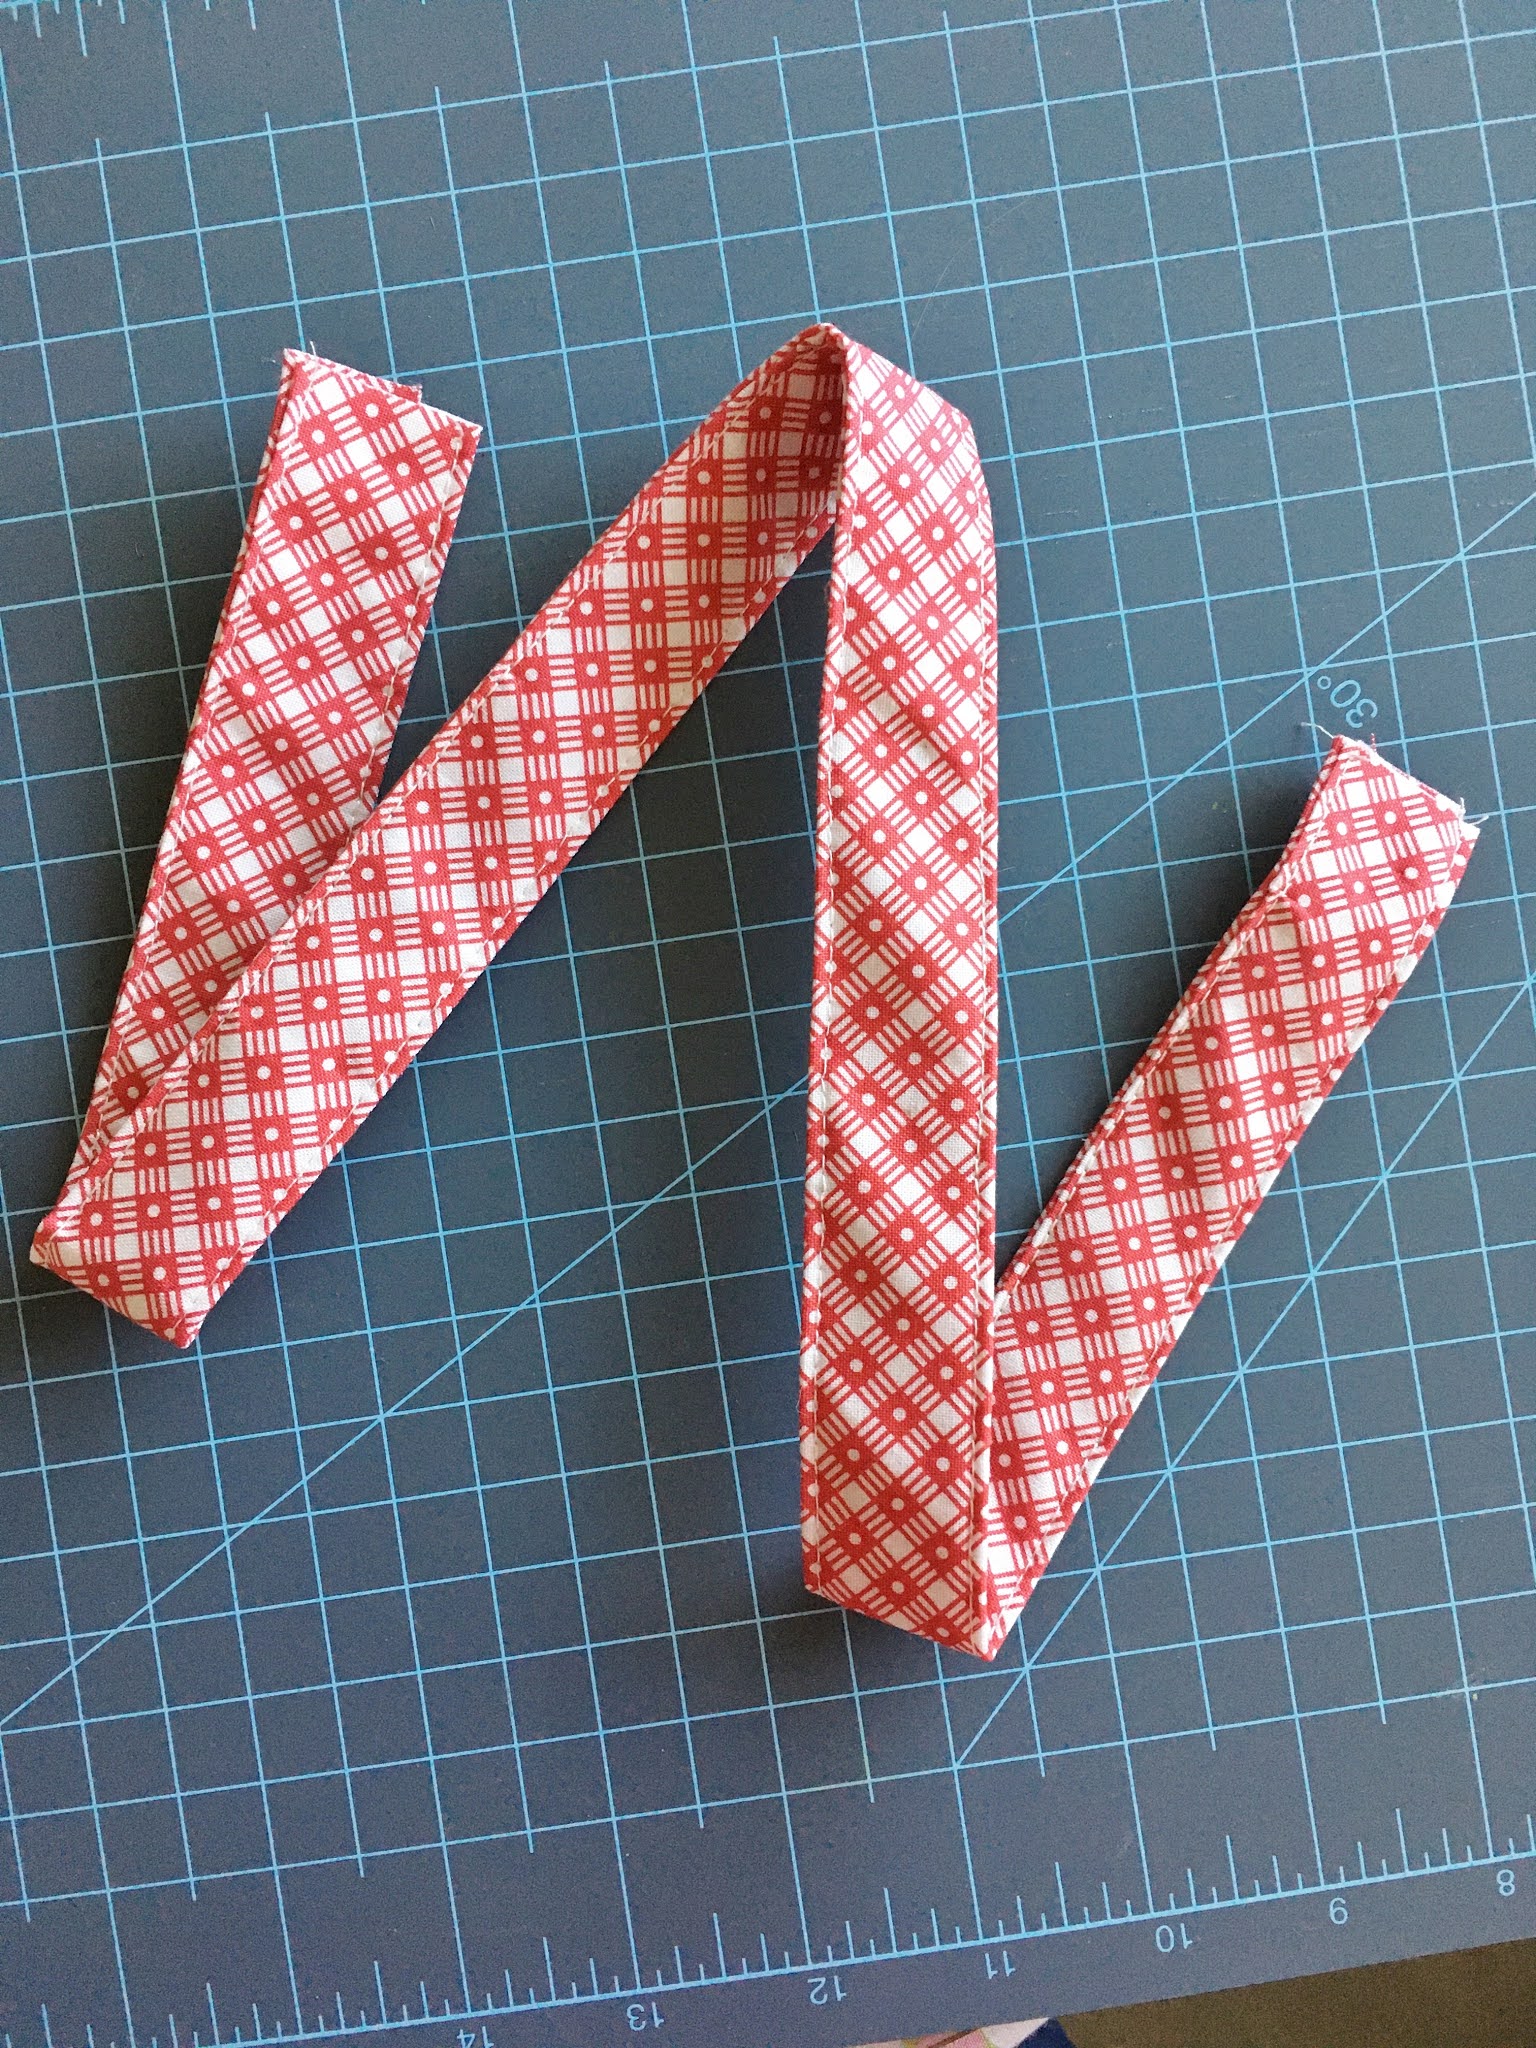
(2) 4" x 25" strips from the handle fabric
(2) 2" x 25" strips from fusible interfacing (it's ok to piece shorter lengths together, overlap two ends together slightly and zigzig stitch)
Optional pocket: Cut one small "applique" square and one lining piece the same size
Fuse one 16" interfacing square to the back of each 16" panel square following manufacturer's instructions.
SEW:
Pin and sew fused panel squares right sides together along sides and bottom using a 3/8" seam allowance. Sew another seam between that seam and the edges for added strength.


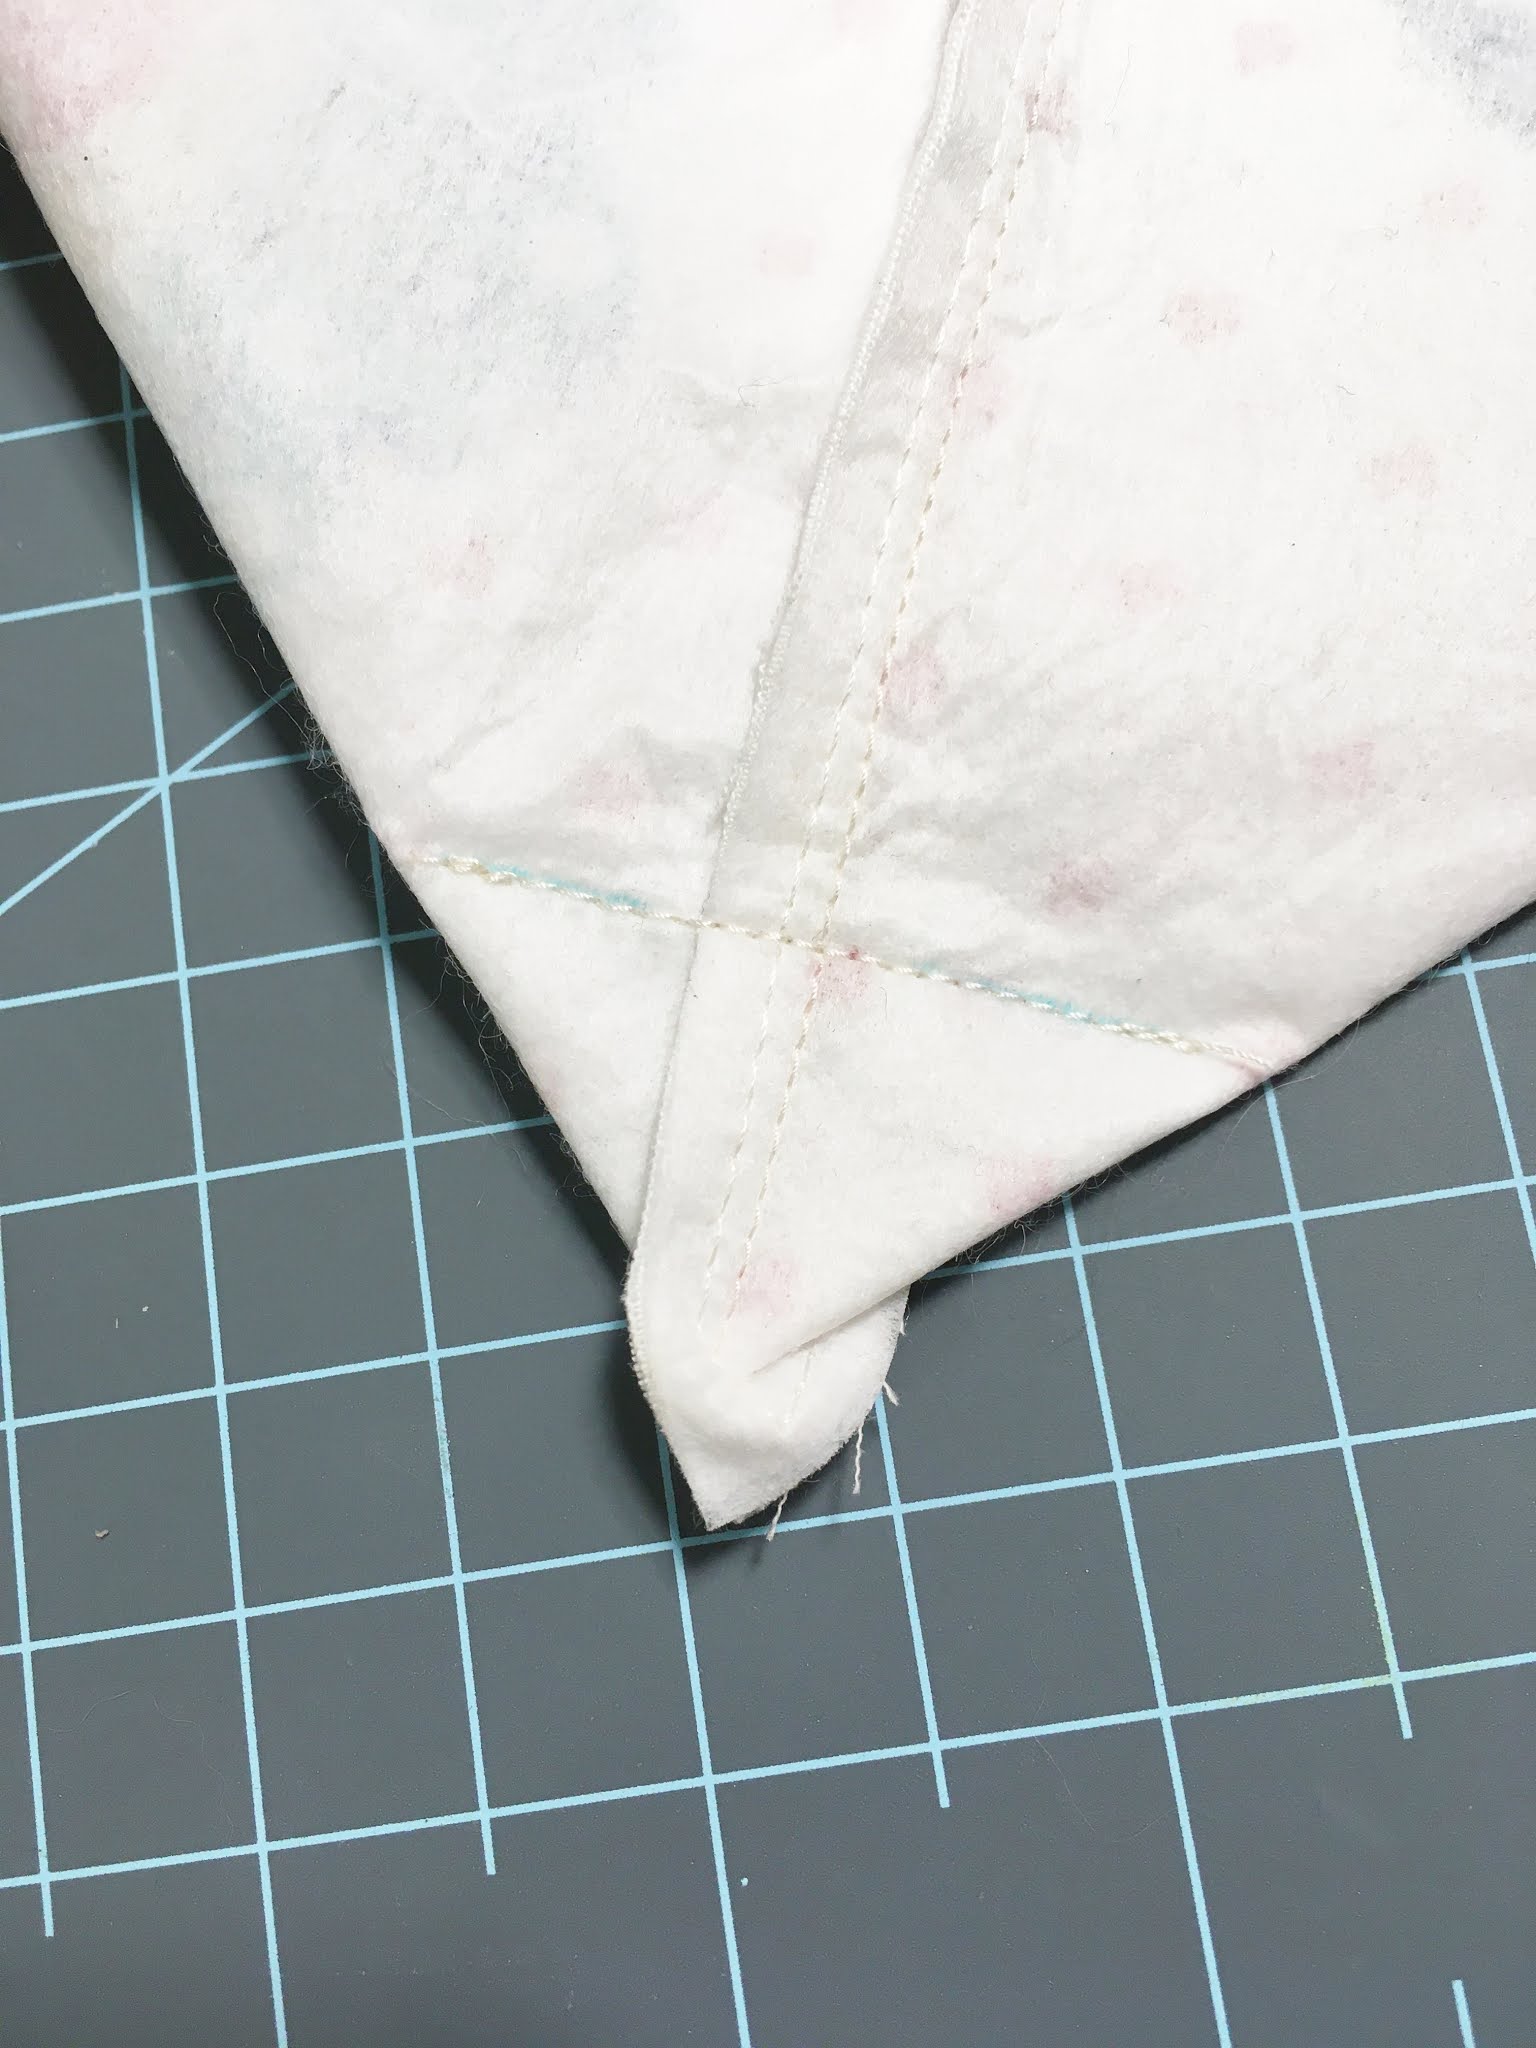
If you want boxed corners, fold bottom corners as shown, then draw a 2" line across the top of the "triangle", sew on that line. Trim corners if desired (I didn't).
Turn bag right sides out and press seams to one side.
For handles: Fuse a 2" x 25" strip of interfacing to the wrong side of each strap piece down the middles, Fold in 1" on each of the long sides, press. Fold in half lengthwise, press. Topstitch on each side of both straps.
Attach ends of each handle to top edges of front and back of bag (handles facing down), centered, 5" apart. Baste in place.


Sew the two lining pieces together along sides and bottom using a 3/8" seam allowance and leaving a 6" opening along bottom edge. Box bottom corners like for the bag. Press seams to one side. Leaving wrong sides of lining out, fit over bag right sides together, matching raw edges at the top. Pin and sew 1" seam along the top raw edges.

Turn right sides out through opening. Turn raw edges of opening under, pin and sew closed. Push lining into bag. Topstitch 3/4" along the top edge of bag. Enjoy!

Stacy

Fabrics used are from Lori Holt's Flea Market collection by Riley Blake available here in my shop