Showing posts with label Sewing Room. Show all posts

Tuesday, July 30, 2019

How I Make Time to Sew


When my kids were young, it seemed like I had more time to sew.  When they took naps, I would hurry to the sewing machine; while I waited in school parking lots, I'd do some hand sewing.  I basically squeezed in sewing whenever I could.

Life seems busier now, and even though most of my kids have grown up and moved out, I have trouble finding time to sew.  Maybe it's because I'm more in charge of my time now, I just keep putting other things ahead of my sewing projects.  

I needed to try something different.  I decided to try sewing 15 minutes a day - consistently.  And you know - it has really helped!  I'm kind of amazed at what I can get done in that short amount of time.  For example, while working on a sample for the shop recently, I found that in 15 minutes I could do one of the following:

  • Clear off my work area and thread my machine
  • Cut thirty 5" squares
  • Slice 36 sewn half-square triangle units and press open
  • Trim 36 half-square triangle units
  • Rip out a wonky seam, then pin and sew back together
  • Pin and sew 2 rows together
You get the idea.  And the time really adds up - 15 minutes per day x 6 per week = 1 1/2 hours!  Even if you just sew 4 times a week, that add up to an hour. 

Some tips to make this method successful:
  • Leave your sewing machine set up.  If you can't do this, then make it as easy as possible to get to (like keeping it in the room you'll be using it)
  • Keep your project and supplies out and together, preferably near your sewing machine.  If you have to put them away, clear storage boxes or those clear bedding bags work great
  • Think ahead.  When your 15 minutes is done, think about what you'll need for the next step and try to have the supplies ready to go (ironing board, seam ripper, full bobbin, etc)
  • Leave yourself a note as to what the next step is
  • Consistency is key; put a reminder on your phone is you need to 
If you're having a hard time getting to your projects, try sewing for 15 minutes a day.  I think you'll be surprised at how much you get done.

xoxo Stacy 


See what I'm up to on Instagram

Sign up for my shop email newsletter here and get 15% off your first order!


Wednesday, April 27, 2016

Strawberry Biscuit Blog Hop Here Today!


Welcome to my stop on the Strawberry Biscuit blog hop!  Oh my goodness - have you seen all the adorable projects being made with Elea Lutz's new collection?  Quilts, bags, kitchen accessories, baskets, pillows, skirts and even dolls.

I love the happy colors and sweet motifs of this vintage-y collection (I mean, how could you not?), and since they are the colors in my sewing space, I thought baskets to hold sewing supplies would be fun to make.       

I made three sizes so they could hold a variety of items like threads, scraps, notions, leftover binding, leaders & enders, you get the idea.

small
medium
large
For the inside of the largest, I used this pink print which has sweet little animals playing together.


There are MANY good tutorials available for fabric baskets, but this one is the most similar to the method I used.  It's basically like making a pouch without the zipper, and adding handles.  I used Pellon fusible batting ironed to the outside instead of interfacing.  Quilting would have added a nice touch and more stiffness.    


Because I loved the gray floral so much, and because my other phone case was getting a little ragged, I used some scraps to make myself a new one. 


I made the case so my phone would be snug, added a loop for my house key, and used the selvage to give it a cute tag.  Now when I go for a walk, I just grab my phone and go.  For a quick trip to the store, I can also tuck in my license and debit card. It even garnered a compliment from my teenage son. *smile* If anyone is interested in a tutorial, let me know in the comments and I'll get one done. 


I hope you enjoyed your stop.  Thank you Elea and Penny Rose for allowing me to participate!  For more inspiration, go check out the next stops on the hop:

28 April - Megan of Sew Style Love (@dollyhenryau)

28 April - Kimberly of Fat Quarter Shop (@fatquartershop) 

29 April - Christa of Cotton Berry Quilts (@cottonberryquilts)

29 April - Elea of Elea Lutz Design (@elealutz)
 
Come see me on Instagram at https://www.instagram.com/farmroadquilts/
 

Tuesday, June 30, 2015

Summer Sewing

Is it hot where you are?  Summer is in full-swing here; most days hovering around 110°. At this time of year, the most we can hope for is it doesn't get any hotter.  : /

Anyway, I've been inside (when I'm not out in my garden picking endless tomatoes) working on some small projects.  First a little potholder for the patriotic holidays.  I used two layers of cotton batting and  a stretch zigzag stitch (I think that's what it's called) about 1/2" apart to quilt it.  This combo gives it a nice texture. 


Next is a little lettuce drying/storage bag that I've been wanting to make for a while.  If you haven't heard of this, you just put your freshly washed greens in the bag. pull the drawstring, go outside (very important) and start doing arm circles.  You'll be surprised at how well this works to dry your lettuce. 


According to what I read, you can also store your greens in there too.  I'll be trying that with the next batch of lettuce I get. 

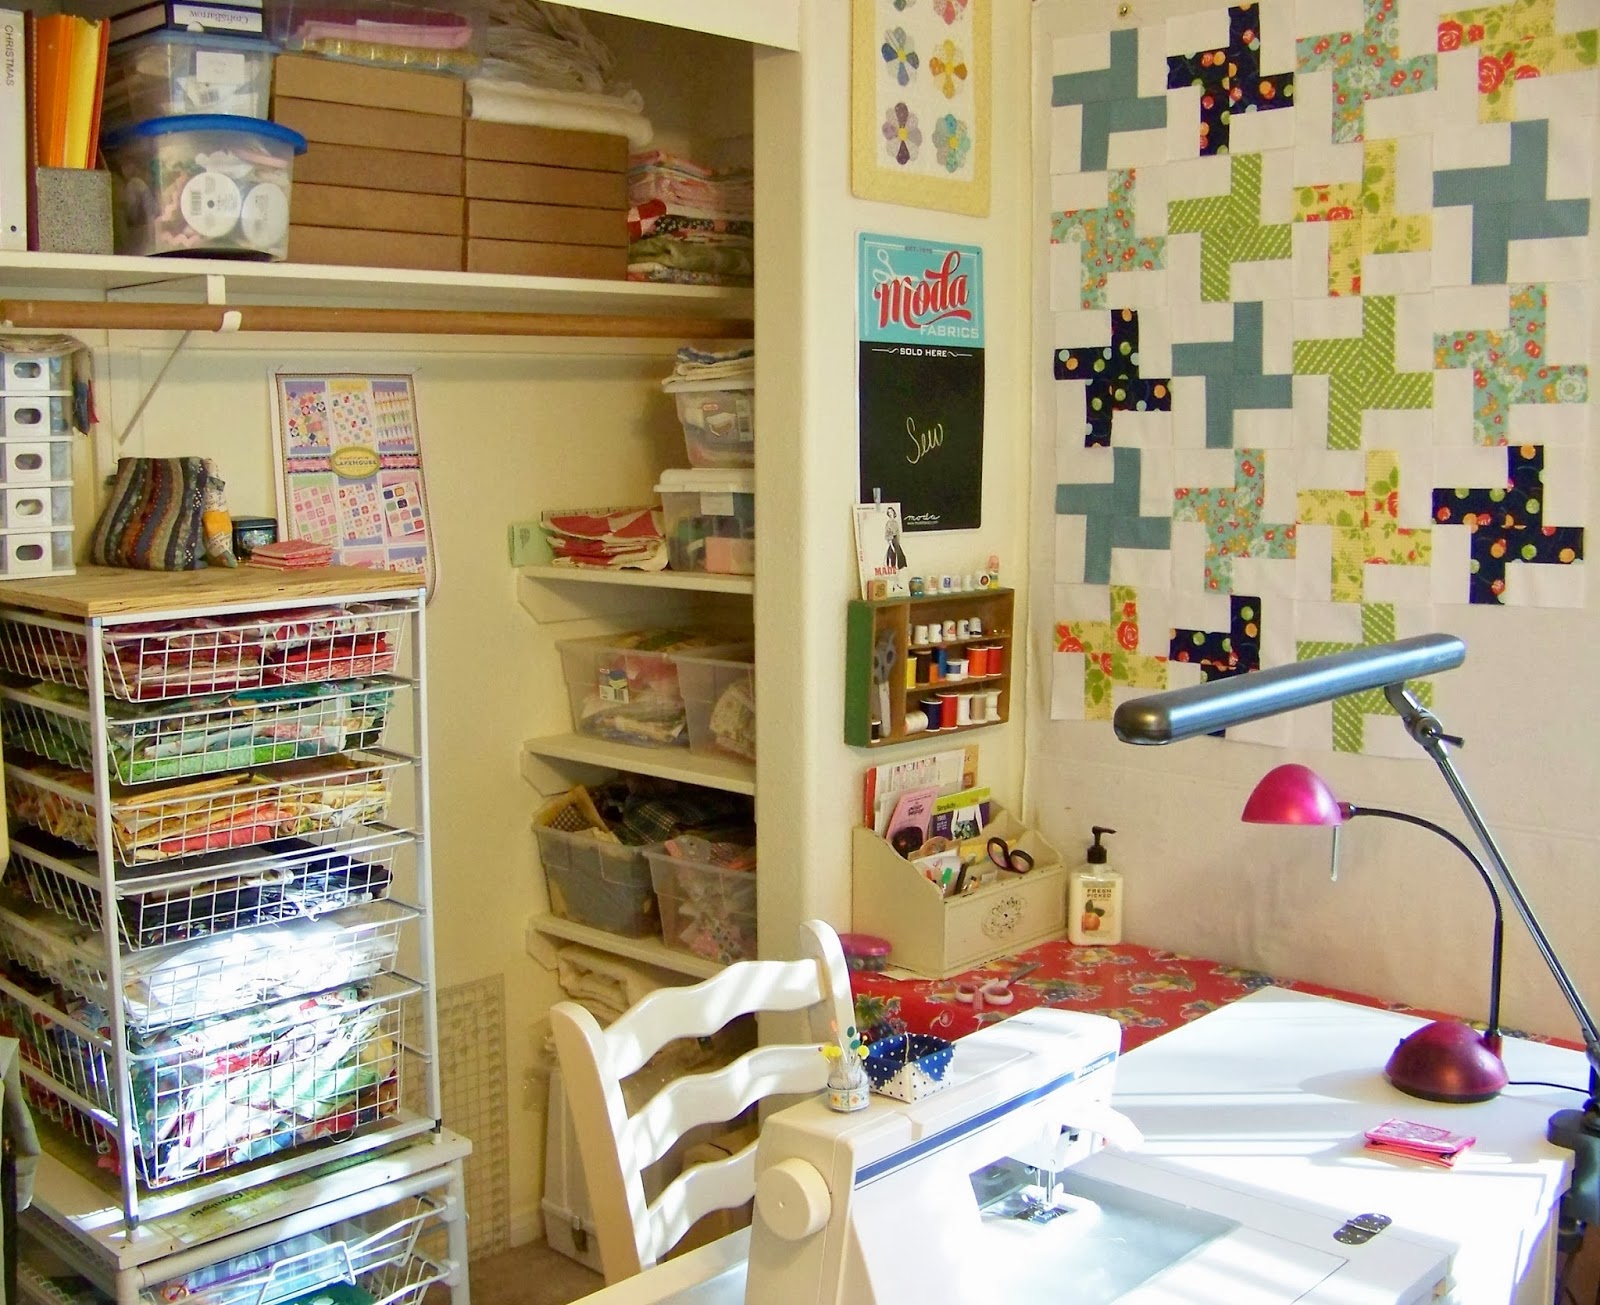
I've also been working on organizing my sewing space.  Here's a snapshot of part of my little corner.


I'm using the chalkboard to remind me of my current projects.  I get distracted.  : )   The chevron blocks are made of Farmhouse by Fig Tree & Co. (coming soon).  They'll be going into a table runner shortly.

I've also been working on some secret sewing.  Here's a sneak-peak:


I'm loving the teal and orange combo right now.  I'll be able to share more on this project real soon. 

Come see me on Instagram! 

Linking to:  Quilt Story: Fabric Tuesday!
                         My Quilt Infatuation: Needle and Thread Thursday 
                         Crazy Mom Quilts: Finish It Up Friday

Tuesday, June 3, 2014

Simple Project: Ironing Board Cover


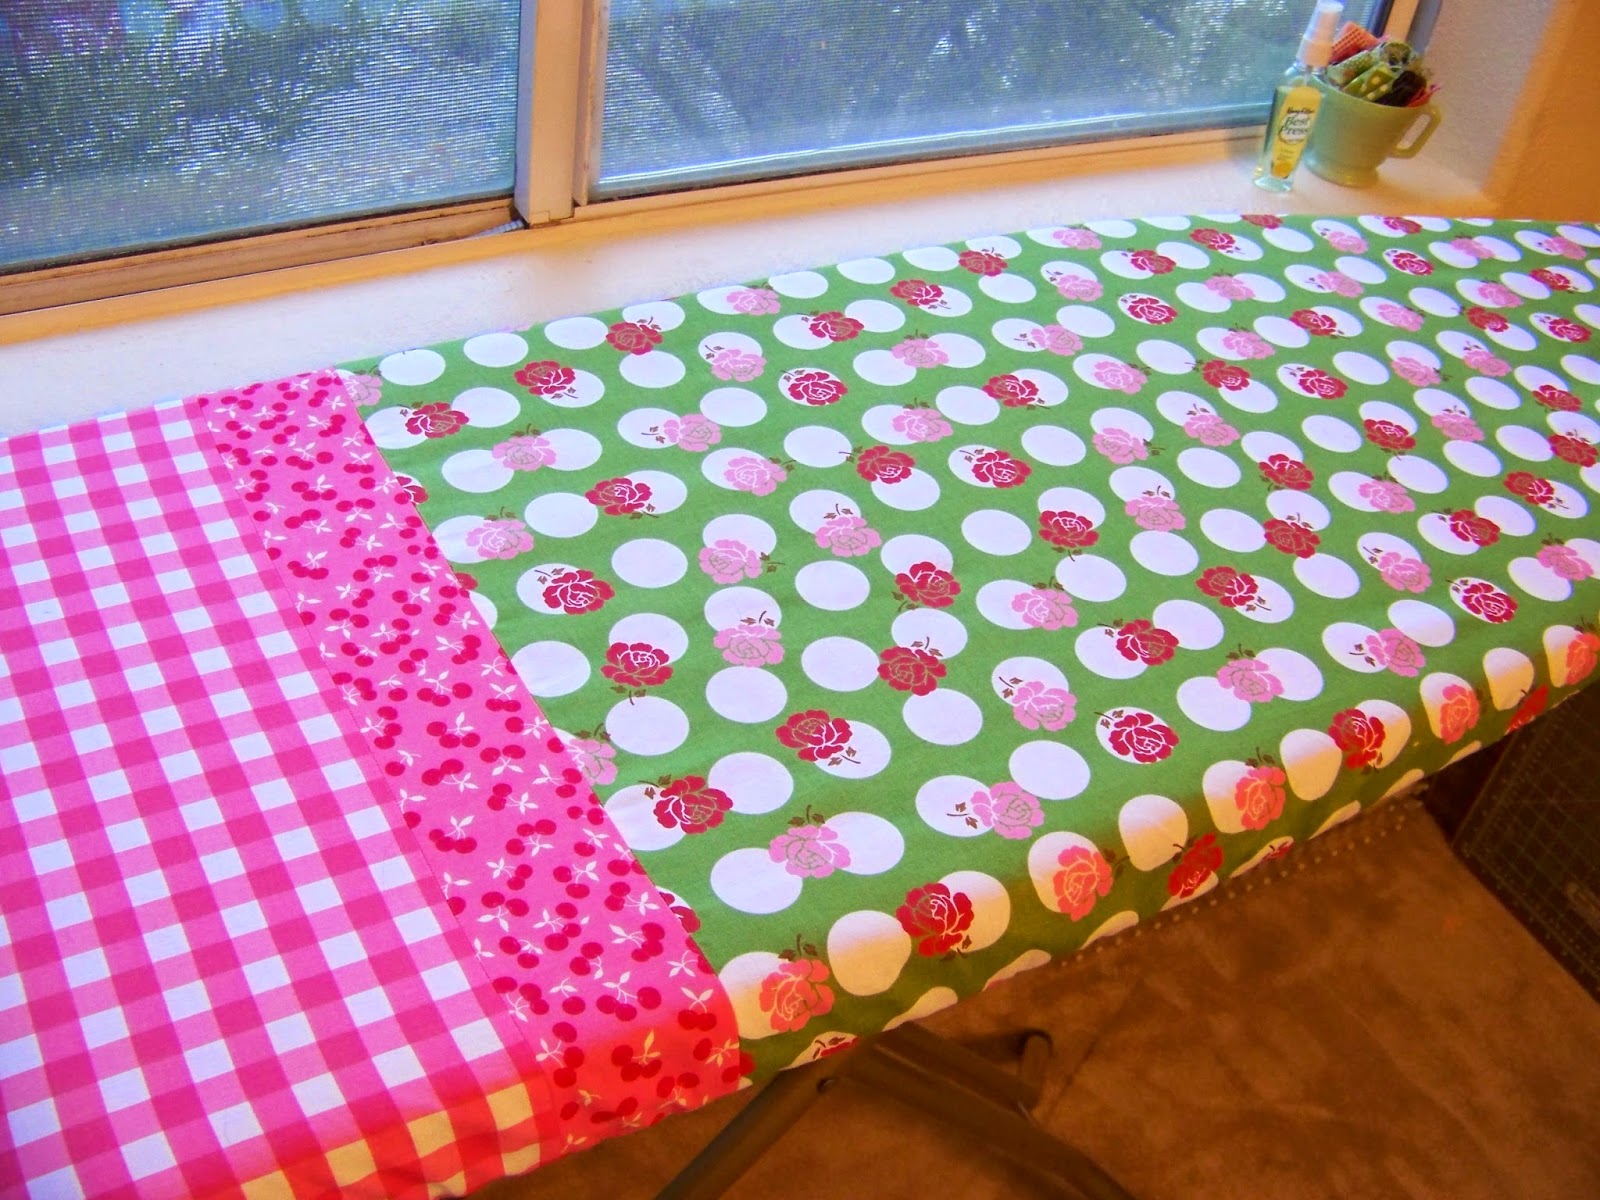
I decided to clean up my sewing space last weekend, and after moving my ironing board to a new spot, thought it could use a new cover.  I looked around online and found this tutorial.  After choosing the fabrics, I got to work.  It was pretty easy to make; I think it took longer to pick out the fabrics than to actually make it. I just put the new cover over the old one, which had the padding attached. 

tie on new cover, old one still in place


I did make one mistake {maybe two}.  When tracing around the board, I only left 3 1/2" instead of the 4" that the tutorial recommended.  It doesn't seem to be causing any problems though.  I really like how it turned out, and that it adds a pop of color to my white room.  The maybe mistake is that I didn't pre-wash my fabrics.  Hopefully they won't bleed or shrink too much.  Maybe all that heat will set the dyes.  : /


All in all, it was a fun project! Now I'm thinking about painting a cabinet in the room a fun color, like apple green.  My son, who shares the space, asked that I not paint it pink.  : ) 

Fabrics used:  Sew Cherry (green dot/flower) and Large Gingham by Riley Blake, Pam Kitty Picnic (middle band) by Pam Kitty/Lakehouse.  

Linking to:  Sew Many Ways - Sew Darn Crafty
                    Quilt Story - Fabric Tuesday 

Thursday, February 20, 2014

Hello Again

Good to be back!  Here's what I've been up to:

I started a new quilt using Bonnie and Camille's Happy Go Lucky fabrics.  I'm calling it "Happy Pinwheels".  I have almost all of the 63 blocks done.  


Still tweaking my new sewing space -


Found some treasures at the thrift store -

some coveted turquoise Pyrex, and hex-y juice glasses

vintage pillowcases

And made some little needle books using this panel -


What have you been up to? 

Sharing at:  NTT at My Quilt Infatuation

Thursday, October 24, 2013

Some Christmas Sewing


I finally decided what to do with my 12 Days of Christmas fabrics after hoarding them for the last couple of years.  I saw an easy tutorial on Amy Smart's blog that I thought would be perfect for getting a quick Christmas quilt together.  It was a piece of cake to cut out (took about 2 hours) and is so easy to piece.  I'm making 30 blocks for a finished size of approx. 52" x 63", which is a perfect throw-size.  Here it is on my flannel wall (sorry for the blurry picture):


 A close-up:


I'm loving it.  Think I'll free-motion quilt it with wavy lines, or loopy lines. I'm also loving working in my new cozy sewing corner.  I haven't done much with it since I last posted about it.  I think I'll paint the dresser (below) a fun bright color, like blue, and maybe put up red & white gingham curtains.  Or white curtains with pom-pom trim.   


Have a great weekend.  I have big plans for mine and will share next week.

Linking to:  I Quilt Thursdays @ Pretty Bobbins
                 Fabric Tuesday @ Quilt Story
                 We Did It Wednesday @ Sew Much Ado

Tuesday, August 27, 2013

What I'm Working On


This week I'm working on getting my Posie Patch top finished.  My friend Christa and I taught this class at our local quilt guild's annual retreat two years ago.  Mostly, Christa did the teaching and I provided the kits.  I need to make seven more applique and seven more 9-patch blocks, then add 2" wide white borders.  It will finish about 47" x 59", perfect for hanging on the wall in my new sewing space


(actually brighter in person)

I would love to be able to get the binding on and get it finsihed at this year's retreat!

Fabrics used:  various lines by Susan Branch/RJR Fabrics 

Linking to:  A Bowl Full of Lemons: One Project at a Time
                  Cozy Little House: Tweak It Tuesday 
                  Quilt Story: Fabric Tuesday 
                  Freshly Pieced: WIP Wednesday 

Monday, August 19, 2013

My New Sewing Space


After my 21-year-old daughter moved out last November, we had an extra room in the house - yippee!  After months of considering what to do with it, we've decided it will be a sewing/guest/office/exercise room (still not sure what to call it).  I painted over the bubblegum pink walls with a creamy white, and I love how it looks.  Last week we started moving things in.  I'm not near done with it, but this is what I've got so far.


My husband took the doors off the closet and that gave us a lot more room.  On the right side, I'll store my fabrics, projects and supplies.  See those cardboard mailing boxes on the top shelf of the closet?  They hold my works-in-progress.  They're about 9"x12"x2", are the perfect size, and stack nicely.  The top sliding baskets hold misc. scraps, and the bottom baskets hold my notions.  I have more to put in there, but the basics are there.  My flannel board will go up on the wall next to my machine.  The dresser will hold my rotary-cutting mat and iron.


The left side of the closet holds my son's computer (he's 13).  My husband's desk will go on the opposite side of the room next to the treadmill.  It will be nice to have them in there while I'm sewing.  Or using the treadmill.  We'll see.  :)

We still have to bring in my tall cabinet with fold-down table, TV and ironing board.  And maybe hang some curtains.  I'm looking forward to giving it some vintage personality, maybe with reds and blues.  

Linking to:  Tuesdays With a Twist
                 Tweak It Tuesday 
                 Share Your Cup Thursday 
                     From The Farm BlogHop